EXCHANGE SERVER 2007/2010: HOW TO CHANGE THE PRIMARY EMAIL DOMAIN
A common scenario for Exchange Server
administrators is a customer that needs to change their primary
email addresses to a new domain name.
For example a company that uses @exchangeserverpro.net
as their email address might be acquired, or merge, or simply be
rebranding to another name and wants to use @exchangeserverpro.com
as their email address instead.
The Exchange Server administrator’s task
is to:
·
Make the new primary email addresses of @exchangeserverpro.com
begin to work
·
Make the previous email addresses of @exchangeserverpro.net
continue to work
There are two features of Exchange Server
2007/2010 that need to be changed for this to happen.
Accepted Domains
The first feature is the Accepted
Domains. This is the feature that tells an Exchange 2007/2010
organization which domain names it will accept mail for, and how to
treat that domain name.
Accepted domains can be authoritative (ie,
the organization owns the domain name and uses it for mail
recipients) or can be a relay domain (ie, the organization will
accept the emails but send them elsewhere).
There are a few other options such as
shared SMTP namespaces but for the purposes
of this scenario we’re just dealing with authoritative domains.
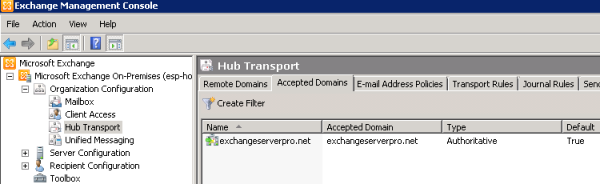
To add a new domain name to the
organization launch the Exchange Management Console and
navigate to Organization Configuration/Hub Transport. Select
the Accepted Domains tab to view the current list of domains.
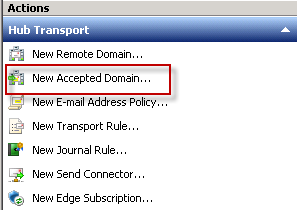
In the Actions pane click on New
Accepted Domain.
Enter a Name and the Accepted
Domain itself. The name can really be anything you like but most
administrators just make it the same as the domain they are adding.
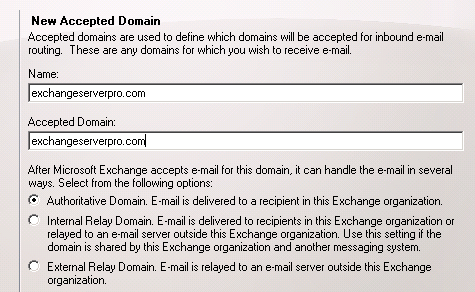
Click New and then Finish
to complete the wizard.
Note that if you have Edge Transport servers deployed in your
network they will not receive the updated list of Accepted Domains
until the next scheduled synchronization of the Edge Subscription.
Email Address Policies
Now that the new domain as been added as
an Accepted Domain the next step is to configure an Email Address Policy.
Email Address Policies determine which
SMTP addresses as are assigned to which objects in the organization,
such as mailboxes, contacts, and distribution groups. Each
organization has at least one Email Address Policy that by default
will apply to all mail-enabled objects.
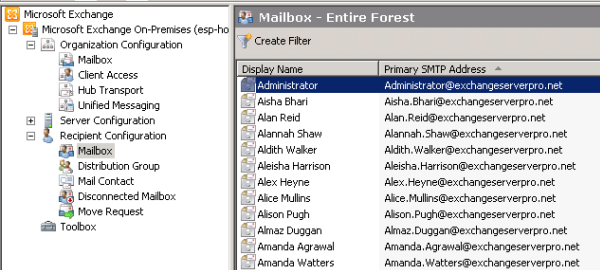
Here we can see mailbox users assigned
with @exchangeserverpro.net email addresses.
In the Exchange Management Console
navigate to Organization Configuration/Hub Transport, and
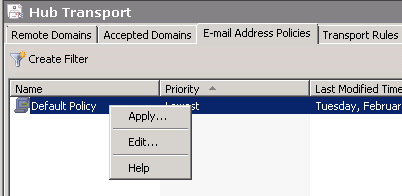
then select the Email Address Policies tab.
In this scenario we’ll just modify the
default policy for all mail-enabled objects. Right-click the
Default Email Address Policy and select Edit.
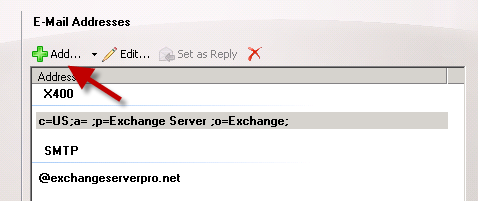
 Click
Next to skip past the introduction and conditions, until you
reach the Email Addresses part of the policy. Click on the
Add button.
Click
Next to skip past the introduction and conditions, until you
reach the Email Addresses part of the policy. Click on the
Add button.
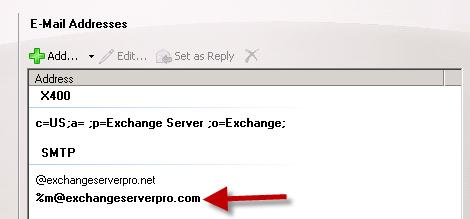
The Email address local part is an
optional setting. If you do not specify one the Alias is used
as the prefix of the email address. If you do specify one you can
use the Alias or other combinations such as Firstname.Lastname.
Next type the domain name or click
Browse to choose it from the list of Accepted Domains.
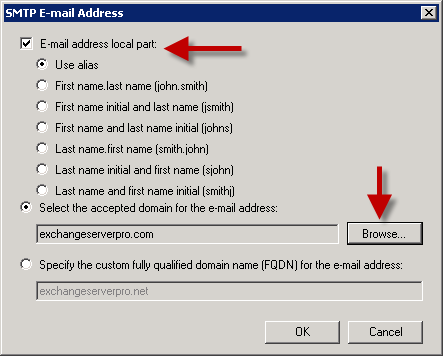
Click OK once you have configured
the new SMTP email address. Select the newly added SMTP address and
click on Set as Reply.
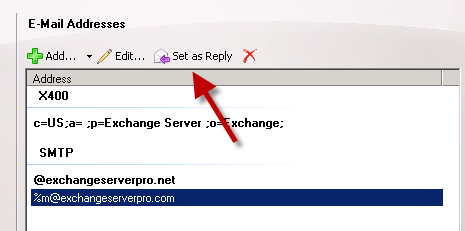
This will change the new address to bold,
which means that it is the address that mail will appear to be sent
from. The other email addresses in the policy will allow
people to continue to receive email sent to those addresses.
Click Next to continue. Now we can
choose when the updated policy will be applied to recipients.
Usually this will be immediately, however you can choose not
make the changes without applying the policy, or schedule it for a
later time.
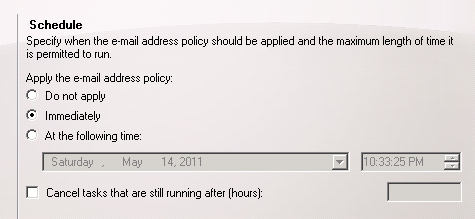
Click Next, and then click Edit
to complete the wizard. Depending on the size of your environment
this may take some time to finish applying.
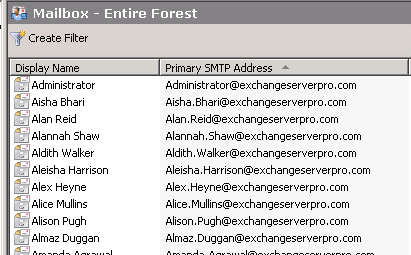
After the new policy has been applied you
can see the change by refreshing the list of mailboxes. Notice that
the primary SMTP addresses have changed from @exchangeserverpro.com
to @exchangeserverpro.net.
If you look at one recipient you can see
that the new primary SMTP address has been applied by the policy,
and the previous email address has been retained as well to allow
mail sent to that address to continue to be received.

You can see that after these tasks have
been completed the organization has had the primary email domain
changed to a new one while preserving the existing one at the same
time.
DOWNLOAD IT
EXCHANGE SERVER 2007/2010: HOW TO CHANGE THE PRIMARY EMAIL DOMAIN.pdf