Windows 7 Screen Saver Timeout Settings
How to Set or Change the Screen Saver Timeout Period in Windows 7
Screen Saver Timeout Settings fix to try first
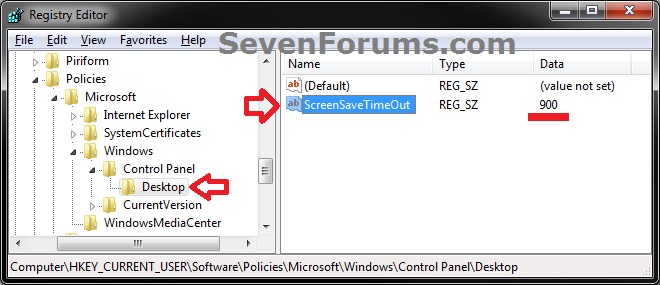
[HKEY_CURRENT_USER\Software\Policies\Microsoft\Windows\Control Panel\Desktop]
Delete the "ScreenSaverIsSecure" value.
If this comes back, you may have to use Group Policy Editor.
User Configuration | Administrative Templates | Control Panel |
Personalization | Password protect the screensaver.
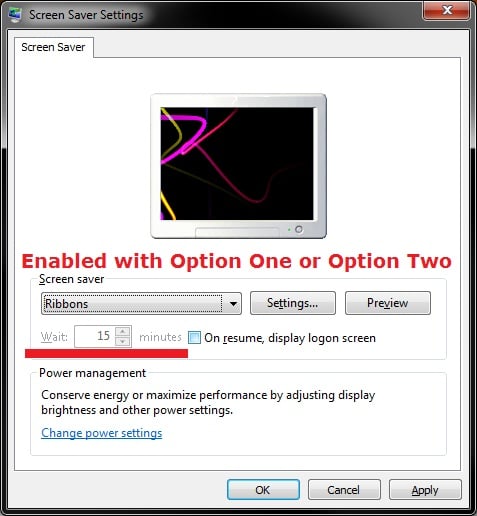
EXAMPLE: Screen Saver Timeout Settings
NOTE: Wait X minutes is grayed out if you used OPTION TWO or OPTION THREE below to enable a screen saver timeout period for all users.
OPTION ONE
Change or Set Screen Saver Timout for "Current User" Only
NOTE: This option will only affect the user that you are currently logged in as.
1. Right click on a empty space on the desktop and click on Personalize.
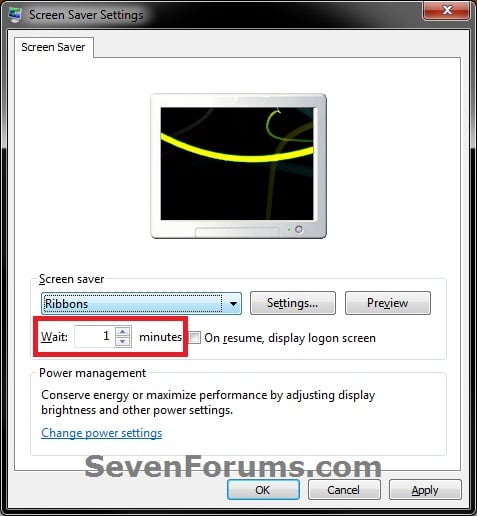
2. Click on the Screen Saver link at the bottom of the Personalization window. (see screenshot below)3. If You Selected a Screen Saver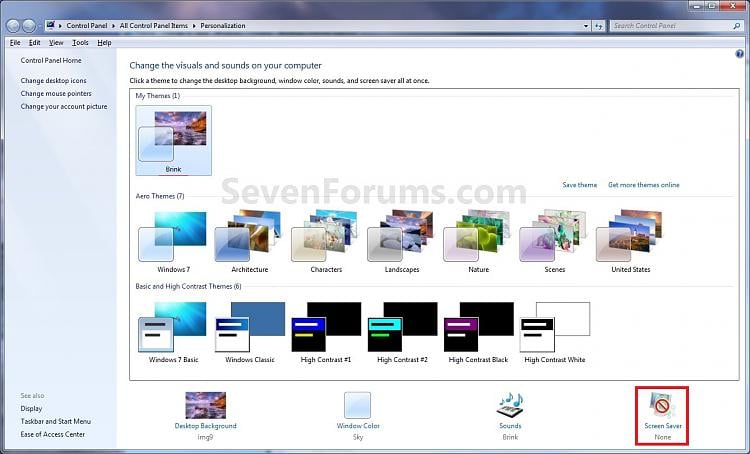
A) Select how many idle minutes to Wait before the selected screen saver displays.4. If You Selected (None) for No Screen Saver
B) Decide if you wanted to turn the screen saver password protection on or off.
C) Go to step 5.
A) Check the On resume, display logon screen box.5. Click on OK. (see screenshot below)
B) Select how many idle minutes to Wait before going straight to the log on screen without a screen saver displaying first.
OPTION TWO
Through Local Group Policy Editor for "All Users"
NOTE: This option will override OPTION ONE. You will need to be logged in as an administrator to be able to do this option
1. Open the all users, specific users or groups, or all users except administrators Local Group Policy Editor for how you want this policy applied.
2. In the left pane, click on to expand User Configuration, Administrative Templates, Control Panel, and Personalization. (see screenshot below)3. In the right pane, right click on Screen saver timeout and click on Edit. (see screenshot above)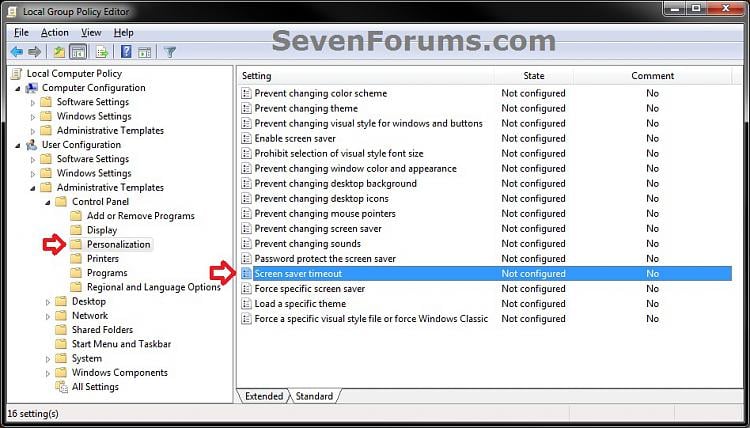
4. To Not Set a Screen Saver Timout for "All Users"
NOTE: This is the default setting, and will allow users to set their own screen saver timeout using OPTION ONE instead.A) Select (dot) either Not Configured or Disabled. (see screenshot below step 6)
B) Go to step 6.5. To Change or Set Screen Saver Timout for "All Users"
NOTE: This option prevents users from being able to change the screen saver timeout "wait" setting in the Screen Saver Settings window.A) Select (dot) Enabled. (see screenshot below step 6)6. Click on OK. (see screenshot below)
B) Under Options, select or type in how many seconds (60 seconds = 1 minute) you want for how much user idle time must elapse before the screen saver is launched. (see screenshot below step 6)
7. Close the Local Group Policy Editor window.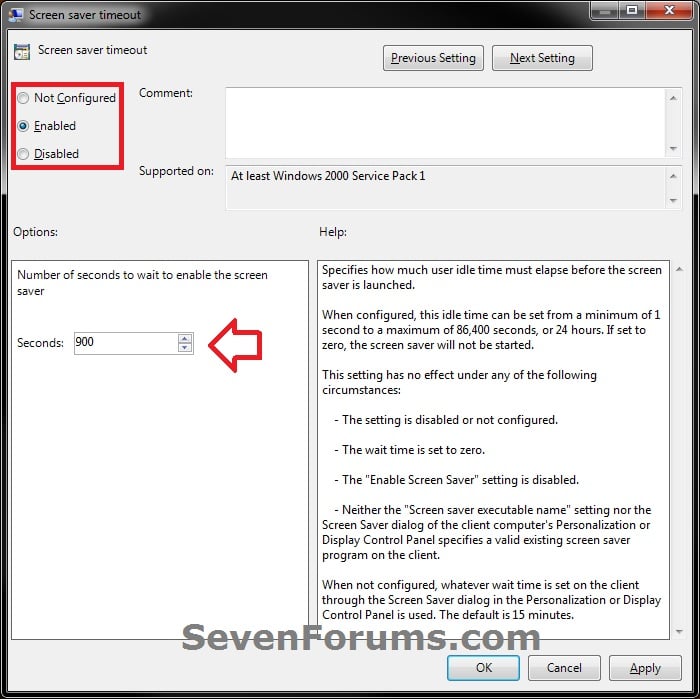
OPTION THREE
Through Registry Editor for "All Users"
NOTE: This option will override OPTION ONE. You will need to be logged in as an administrator to be able to do this option.
1. Open the Start Menu, and type regedit in the search box and press enter.
2. If prompted by UAC, then click on Yes.
3. To Change or Set Screen Saver Timout for "All Users"
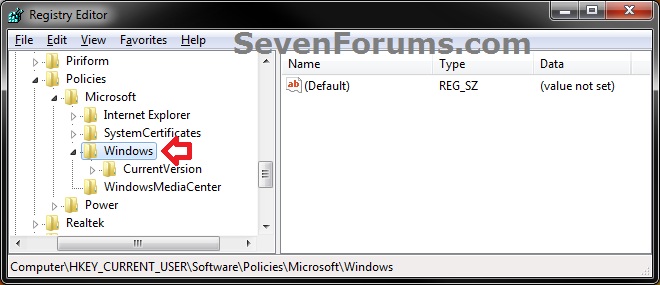
NOTE: This option prevents users from being able to change the screen saver timeout "wait" setting in the Screen Saver Settings window.A) In regedit, navigate to the location below. (see screenshot below)4. To Not Set a Screen Saver Timout for "All Users"HKEY_CURRENT_USER\Software\Policies\Microsoft\Windows
B) In the left pane right click on Windows, and click on New and Key. (see screenshot above)
NOTE: If you already have the Control Panel key (step 3C), then skip this step and go to step 3D.
C) Type in Control Panel and press Enter. (see screenshot below)D) Right click on Control Panel, and click on New and Key. (see screenshot above)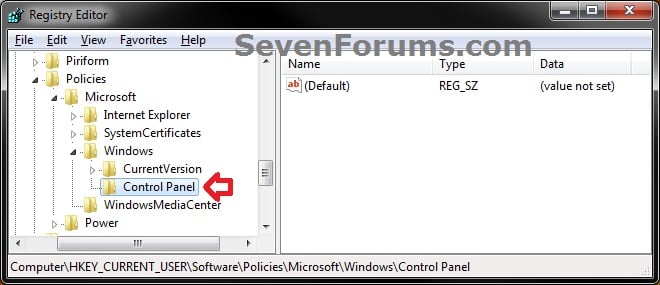
NOTE: If you already have the Desktop key (step 3E), then skip this step and go to step 3F.
E) Type in Desktop and press Enter. (see screenshot below)F) In the right pane of Desktop, right click on a empty space and click on New and String Value. (see screenshot above)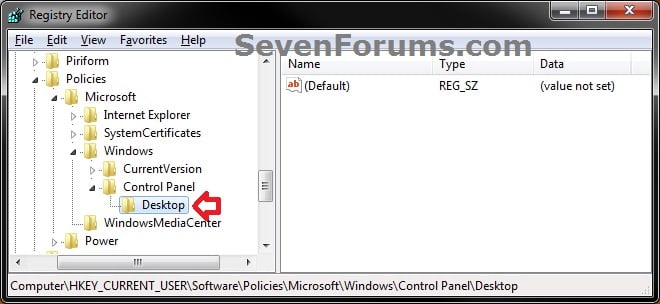
NOTE: If you already have the ScreenSaveTimeOut string value (step 3G), then skip this step and go to step 3H.
G) Type in ScreenSaveTimeOut and press Enter. (see screenshot below)H) In the right pane of Desktop, right click on ScreenSaveTimeOut and click on Modify. (see screenshot above)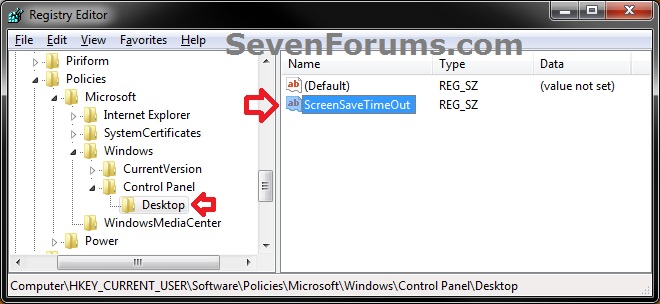
I) Type in how many seconds (60 seconds = 1 minute) you want for how much user idle time must elapse before the screen saver is launched, then click on OK. (see screenshot below)J) Go to step 5.
NOTE: This is the default setting, and will allow users to set their own screen saver timeout using OPTION ONE instead.A) In regedit, navigate to the location below. (see screenshot below)
Code:HKEY_CURRENT_USER\Software\Policies\Microsoft\Windows\Control Panel\DesktopB) In the right pane of Desktop, right click on ScreenSaveTimeOut and click on Delete. (see screenshot above)5. Close regedit.C) Click on Yes to approve deletion. (see screenshot below)